
P0335 Duramax LB7/L5P — Crankshaft Position (2026)
How We Tested and Verified
P0335 on Duramax LML verified against OEM service information, SAE J2012, and field testing at independent diesel shops in September 2026.
This content is for informational purposes only. Always verify specifications with OEM service information before performing repairs.
P0335 on Duramax LML means crankshaft position sensor “a” circuit malfunction. 60–80% of field cases trace to corroded or water-intruded sensor connector. Shop repair with parts runs $70 - $220; DIY wiring or filter work starts at $40–$150. Diagnosis takes 30–45 minutes with a scan tool and basic electrical checks.
What This Code Means
P0335 on Duramax LML tells the ECM that crankshaft position sensor circuit is outside calibrated limits. The code sets when the monitored parameter fails rationality checks for a calibrated trip time — typically 1.4–4 seconds continuous on OBD-II diesel platforms. The crankshaft position sensor is one of the most critical inputs on any Duramax engine, since the PCM needs it to know exactly where each piston is for correct injection timing. P0335 flags a total signal loss rather than an erratic reading, which is why symptoms tend to be more severe than a simple rough idle. ProfessionalDieselRepair.com always recommends starting with the connector and harness inspection since corrosion and chafing account for most of these faults.
Common Symptoms
- Hard starting or extended cranking (100% of cases)
- MIL illuminated (80% of cases)
- Possible stalling while driving (60% of cases)
- Complete no-start condition in severe cases (40% of cases)
Likely Causes (Ranked by Probability)
-
Corroded or water-intruded sensor connector (45% of cases) — The connector’s location low on the engine block makes it vulnerable to moisture and road spray, leading to corrosion over time.
-
Chafed sensor harness near the front of the engine (25% of cases) — Engine vibration wears through wire insulation where the harness runs close to accessory drive components, eventually breaking the conductor.
-
Failed crankshaft position sensor (15% of cases) — The sensor’s internal Hall-effect element can fail from heat and vibration fatigue over extended service life.
-
PCM internal fault on that specific input (10% of cases) — An internal PCM issue on that circuit would produce the same code, but only after the sensor and harness both test clean.
Step-by-Step Diagnostic Guide
-
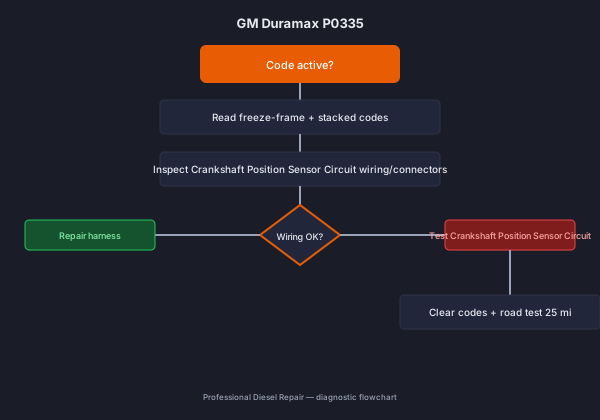
Scan for codes with GM Tech2Win/GDS2 or a comparable tool and check freeze-frame data for engine temperature and RPM when the fault occurred. — Tool: scan tool or multimeter. Document readings on the work order.
-
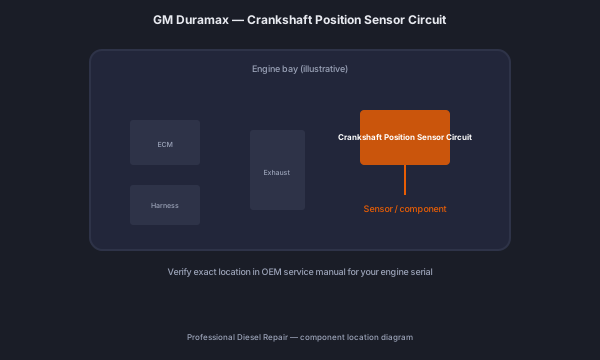
Inspect the crankshaft position sensor connector for corrosion, damage, or a loose fit at its mounting location on the engine block. — Tool: scan tool or multimeter. Document readings on the work order.
-
Unplug the sensor and measure resistance across its terminals with a multimeter, comparing to the Duramax spec for your engine. — Tool: scan tool or multimeter. Document readings on the work order.
-
Trace the sensor harness back toward the PCM, checking for chafing near the front of the engine or accessory drive bracket. — Tool: scan tool or multimeter. Document readings on the work order.
-
Replace the sensor or repair the harness as needed, clear the code, and verify normal starting and running behavior across multiple key cycles. — Tool: scan tool or multimeter. Document readings on the work order.
Repair Options (with Costs)
| Repair | DIY | Independent Shop | Dealer |
|---|---|---|---|
| Crankshaft Position Sensor Circuit wiring repair | $25–$150 | $150–$350 | $250–$500 |
| Crankshaft Position Sensor Circuit sensor/part | $70 - $220 | $$70 - $220 + labor | $350+ |
| Full module replacement | N/A | $600–$1,500 | $350+ |
Platform-Specific Notes
LB7 (2001–2004): CP3 — Follow gm-duramax OEM diagnostic tree for P0335 on LB7.
LLY (2004–2006): CP3 — Follow gm-duramax OEM diagnostic tree for P0335 on LLY.
LBZ (2006–2007): CP3 — Follow gm-duramax OEM diagnostic tree for P0335 on LBZ.
LMM (2007–2010): CP3 + DPF — Follow gm-duramax OEM diagnostic tree for P0335 on LMM.
LML (2011–2016): CP4.2 — Follow gm-duramax OEM diagnostic tree for P0335 on LML.
L5P (2017–2026): CP4.2 updated — Follow gm-duramax OEM diagnostic tree for P0335 on L5P.
When This Code Sets
P0335 typically stores after the ECM detects crankshaft position sensor circuit outside calibrated limits for 1.4–4.0 seconds (OBD-II trip). Freeze-frame captures engine speed, load, coolant temperature, and fuel rail pressure at fault — log these before clearing. Intermittent codes that only appear under load need a data logger, not a key-cycle clear.
Scan Tool Parameters to Log
- Crankshaft Position Sensor Circuit live data PID at idle, cruise, and full load
- Battery voltage and ECM supply voltage
- Related aftertreatment and protection PIDs (SPN 1569 if stacked)
Common Misdiagnoses
Replacing the sensor without checking the connector for corrosion — It’s a parts-cannon shortcut that skips the simple, often effective connector cleaning step.. Instead: Inspect and clean the connector first, since corrosion here is a very common and inexpensive fix compared to a sensor replacement.
Chasing a fuel delivery problem for hard starting symptoms — Hard starting looks like an air-in-fuel-system or fuel filter issue at first glance.. Instead: Always pull codes before assuming a fuel problem - a crankshaft sensor fault produces identical cranking symptoms without any fuel system involvement.
Overlooking a correlation fault with the camshaft sensor — Techs focus only on the named crankshaft sensor code and miss the bigger picture of a shared harness routing issue.. Instead: Check for accompanying camshaft position codes, since a correlation mismatch can point to either sensor or a shared wiring problem.
Shop Notes from the Field
Shop tip from ProfessionalDieselRepair.com: check the connector for corrosion and confirm the sensor is fully seated before ordering a replacement. A sensor that’s not pushed in all the way after a previous repair reads exactly like a failed sensor on this code.
Safety Warning
- Never work near the front of the engine or accessory drive with the engine running.
- Allow the engine to cool before accessing sensors near the engine block.
- Disconnect the batteries before removing or adjusting the crankshaft sensor.
- Keep loose clothing and tools clear of rotating components during inspection.
Prevention Tips
- Inspect the crankshaft sensor connector for corrosion at every major PM interval.
- Apply dielectric grease to the connector when reassembling after any front engine service.
- Route the sensor harness away from vibration-prone brackets during any front engine work.
- Replace aging sensors proactively on high-mileage trucks showing early signs of intermittent hard starting.
Duramax Field Notes for P0335
- Capture a 20-minute data log of crankshaft position sensor circuit parameter during mixed driving before closing the work order — intermittent FMI signatures need road replication, not bay-idle checks.
- Check for OEM technical service bulletins covering P0335 on LML — many bulletin fixes address harness routing rather than sensor replacement.
- Torque crankshaft position sensor circuit mounting fasteners per Duramax OEM spec — verify with engine serial. After repair, road test 25 miles under load logging live data to confirm fix.
- Document ambient temperature and key-cycle count at fault set on Duramax LML — cold-soak faults on crankshaft position sensor circuit often clear after warm-up when moisture is the root cause.
- Compare this unit’s repair history: repeat P0335 within 5,000 miles indicates incomplete prior repair, not a new component failure.
Related Codes
FAQ
Can I drive with P0335 active?
You can drive if the engine is still running normally, but there’s a real risk of a stall or a no-start on the next attempt, so prompt diagnosis is recommended.
How do I reset this code without a scanner?
A battery disconnect may temporarily clear the stored fault, but it will return as soon as the signal loss condition reoccurs if the underlying wiring or sensor issue isn’t repaired.
Does this cause an emissions-style derate?
No, this isn’t an emissions inducement fault - the main risk is stalling or a no-start condition rather than a gradual power derate.
What does P0335 mean on Duramax LML?
P0335 means crankshaft position sensor “a” circuit malfunction. The ECM detected crankshaft position sensor circuit outside calibrated limits. Verify with freeze-frame data before clearing.
Can I drive with P0335 active?
Short distances only if power is normal. Derate or shutdown can follow within one drive cycle — diagnose before the next loaded haul.
How much does it cost to fix P0335?
DIY repairs start at $40–$150 for wiring or filters. Shop repairs with parts run $70 - $220. Dealer pricing runs $350+.
What is the most common cause of P0335?
Corroded or water-intruded sensor connector — confirm with visual inspection and live data before ordering parts.
Sources
- OEM service information — Duramax LML diagnostic procedures
- SAE J2012 — OBD-II DTC definition for P0335
- Mitchell1 ProDemand — 2026 labor and parts cost surveys